
§ How-To
How to Replace a String Trimmer Spool Cap and Spring
Provide a beginner-friendly guide to removing worn caps, springs, and spools and installing new parts correctly. Include simple troubleshooting for jams, poor feed, or loose caps.
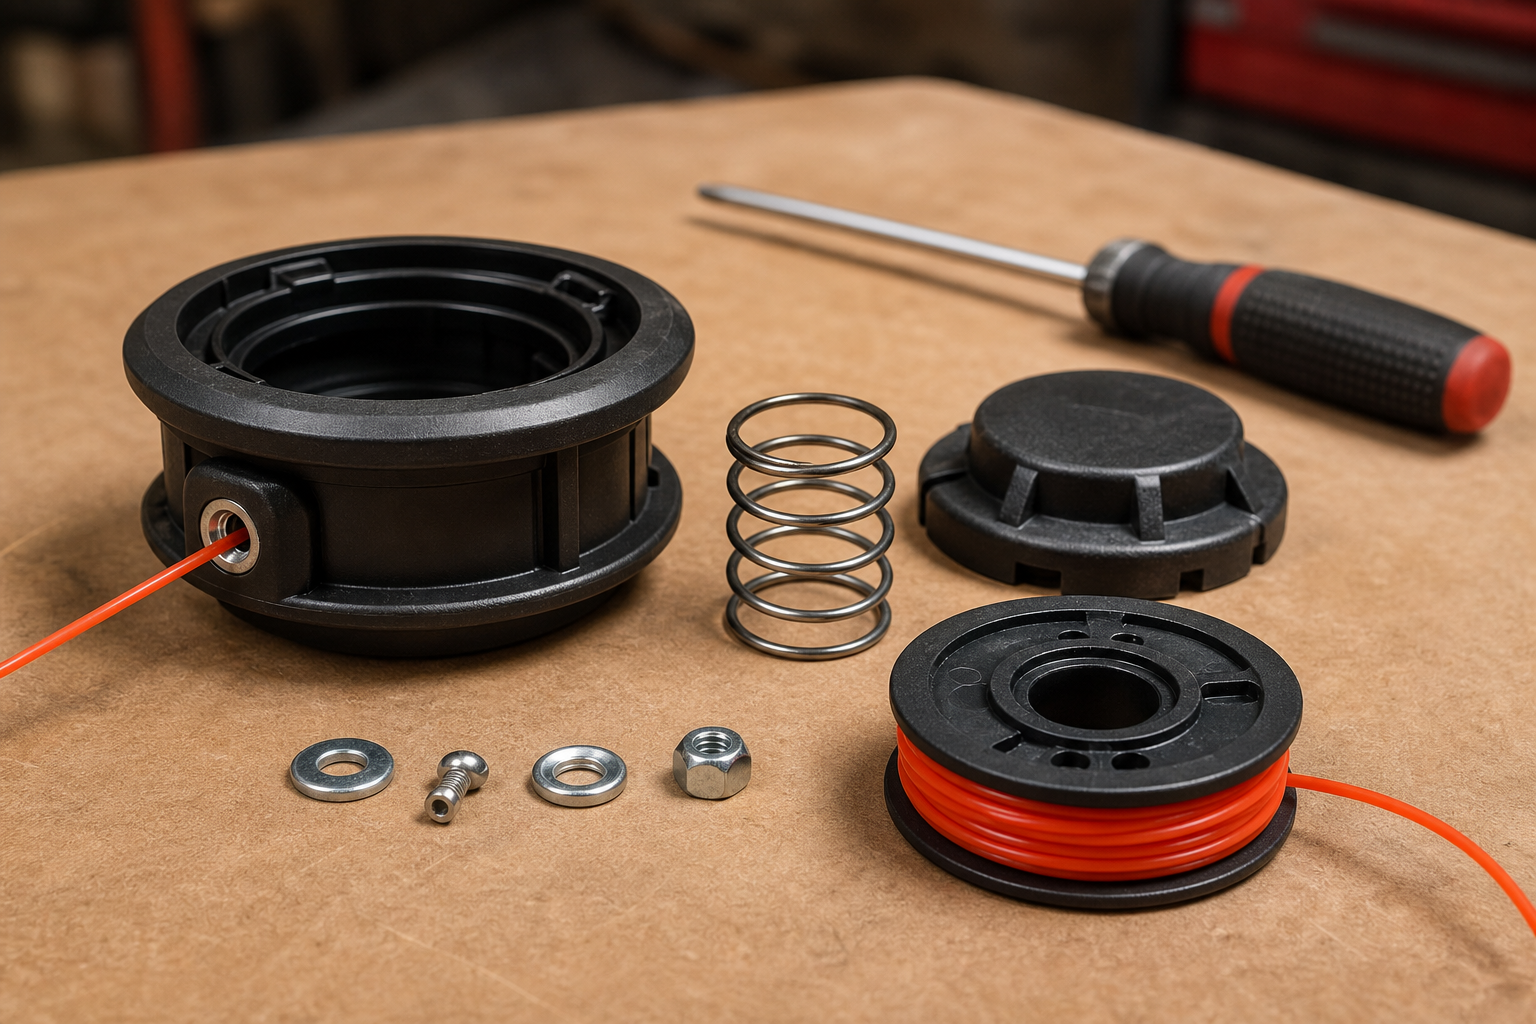
A worn spool cap or weak spring can turn a perfectly good string trimmer into a frustrating tool. If the cap won’t stay locked, the line stops feeding properly, or the head keeps jamming, replacing these small parts is often cheaper and faster than replacing the whole trimmer head. The job is straightforward for most homeowners and service techs: remove the old cap, inspect the spool and spring, fit the new parts in the correct order, and test the head before going back to work.
Know What the Cap and Spring Actually Do
On most bump-feed string trimmers, the spool cap holds the spool inside the head while the spring keeps tension on the spool assembly. That spring pressure helps the head feed line correctly when you tap the trimmer on the ground. If either part is worn, cracked, bent, or missing, you’ll usually notice one of a few common symptoms:
- The cap pops off during use
- The line feeds too much or not at all
- The spool rattles or sits loose in the head
- The trimmer head jams after a few minutes
- The spring is rusty, collapsed, or broken
Before ordering parts, check your trimmer’s model number and compare the head style. Spool caps and springs are not universal just because they look close. The locking tabs, diameter, spring height, and spool depth all need to match. A cap that is even slightly loose will wear out quickly or fly off under load.
A quick bench inspection helps:
- Look for rounded or broken locking tabs on the cap
- Check the spring for distortion, corrosion, or loss of tension
- Inspect the spool for melted edges, cracks, or line crossover
- Clean the head housing so dirt doesn’t hide damage
If the housing itself is cracked where the cap locks in, replacing only the cap may not solve the problem.
Remove the Old Spool Cap, Spring, and Spool
Start with the trimmer powered off. For cordless units, remove the battery. For petrol machines, disconnect the spark plug lead if you’re working around the head for more than a quick swap.
Most spool caps come off one of three ways:
- Squeeze-tab release: press two tabs inward and pull the cap off
- Twist-lock style: rotate the cap slightly and lift
- Center-button style: depress the center and pull the assembly free
Once the cap is off, remove the spool and then the spring. Lay the parts out in order on the bench. That makes reassembly much easier, especially if this is your first time inside the head.
While the head is open:
- Pull out any old line fragments
- Brush out packed grass and dirt
- Check the eyelets where the line exits the head
- Look for grooves or heat damage inside the spool cavity
If the line was jamming, the real issue may be inside the spool rather than the cap. Line that is wound too tightly, crossed over itself, or swollen from moisture can bind badly. Replace damaged line while you have it apart.
A useful tip in the workshop: take a phone photo before disassembly if you are unsure about spring position or spool orientation.
Install the New Spring, Spool, and Cap Correctly
Fit the new spring first, exactly where the original sat. On many trimmers the spring sits in a recess at the base of the head, but some designs place it under or inside the spool. If the spring is not seated properly, the spool may tilt and the cap won’t lock securely.
Next, install the spool:
- Feed the line ends through the eyelets if required
- Make sure the spool sits flat on the spring
- Confirm the spool rotates or indexes as designed, without binding
If you are reloading line at the same time, use the correct diameter specified by the manufacturer. Using line that is too thick is one of the most common causes of poor feed and jammed heads. Wind the line neatly and evenly in the direction marked on the spool. Do not overfill it.
Now install the new cap:
- Align the tabs with the slots
- Press down firmly
- Twist or snap it into place until it fully locks
Give the cap a gentle tug. It should stay secure with no uneven gap around the edge. Spin the head by hand and pull each line end slightly to make sure the spool is seated properly.
Before trimming, do a short test run:
- Refit the battery or reconnect power
- Run the trimmer at low speed first
- Bump-feed lightly if your model uses that system
- Check that line feeds smoothly and the cap stays locked
Troubleshooting Common Problems After Replacement
If you’ve installed new parts and the head still misbehaves, the fault is usually one of a few simple issues.
Line won’t feed
- Line is wound in the wrong direction
- Line diameter is too thick
- Spool is overfilled
- Spring is installed incorrectly or missing
- Dirt is packed into the eyelets or housing
Head jams or binds
- Line crossed over on the spool
- Spool installed upside down
- Wrong spool for the head
- Melted plastic inside the housing from previous overheating
Cap feels loose or pops off
- Wrong cap for the model
- Locking tabs not fully engaged
- Head housing tabs are worn or cracked
- Spring height is incorrect, preventing full cap engagement
Feeds too much line
- Weak or incorrect spring
- Bump mechanism worn
- Spool not seated flat
- Cap not holding the assembly under proper tension
If problems continue after fitting the correct cap and spring, it may be more economical to replace the complete trimmer head, especially on older units with worn housings.
FAQ
Do I need to replace the spool when changing the cap and spring?
Not always. If the spool is not cracked, melted, or badly worn, you can usually reuse it. But if line has been jamming regularly, it’s smart to inspect it closely and replace it if the edges are damaged.
Can I use a universal spool cap and spring?
Only if it is specifically listed as compatible with your trimmer model and head type. Similar-looking parts often differ in tab shape, depth, and spring tension.
Why does my new cap keep coming off?
Usually because the cap is the wrong fit, the tabs are not fully locked, or the head housing itself is worn. Check the locking points on both the cap and the trimmer head before assuming the new part is faulty.
Find the right part on Amazon
Check price, stock and fitment — ships direct from Amazon.
§ Catalog
Shop the catalog


